|
Polar Aligning the SkyWatcher HEQ5/Orion Sirius Mount
If like me you opened up your bright new shiny HEQ5 mount and found yourself stumped by the “Polar Alignment” instructions then this page is for you !!
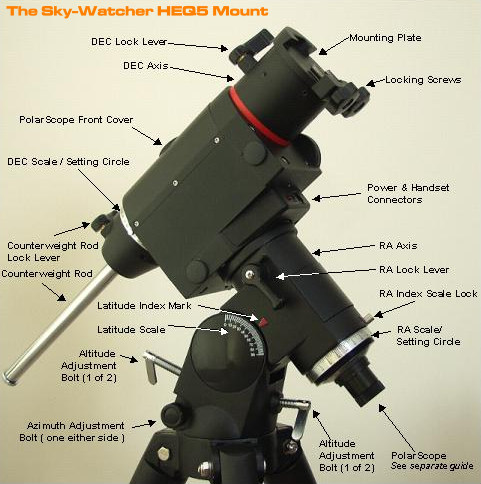
Although this guide is written specifically for the Sky-Watcher HEQ5 mount the unit is very similar to other EQ5 and the EQ6 mounts so it should be applicable to Orion EQ mounts and many other types as far as I know. To check the HEQ5 out and to see if it is the mounting you have or to see where some of the parts referred to in the PolarScope set-up guide are clickthe diagram tab titled “HEQ 5 Parts Labelled” (to the left or at the top if using a mobile)
NOTE: Its easier to do this procedure without the telescope or weights on the mount. This puts less stress on the altitude and azimuth bolts both of which are quite soft and prone to shearing if placed under too much stress it also makes it less likely you will hit your head on the telescope tube and hit the telescope tube against the mount during the alignment procedure.
| GETTING THE POLAR SCOPE READY |
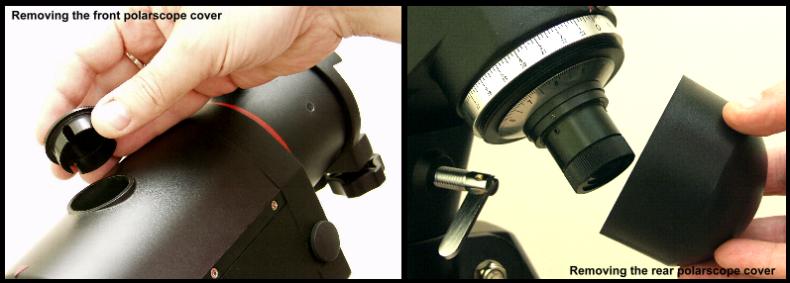
Before starting you will need to remove the covers for the polar scope. The front cover simply clips off, the rear cover has a screw thread. You must also lower the weight bar and rotate the mount through its declination axis until the polar scope is clear. You can check just by looking down the hole underneath the front cover.
| NAMING OF PARTS |
The first thing you need to do is get familiar with the parts of the mount around the polar scope set-up. I haven’t detailed the altitude and azimuth set up because that’s simple enough even for idiots like me but if your really stuck click the diagram tab titled “HEQ 5 Parts Labelled” (at the top). The polarscope is also simple BUT not well explained on most web pages or the HEQ5 Manual.
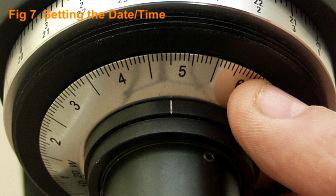
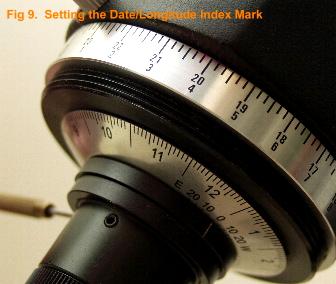
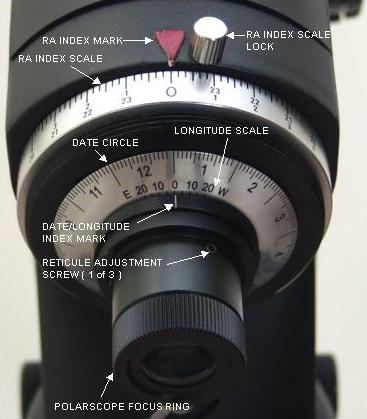 The diagram to the left shows all of the major components of the polar scope APART FROM THE DATE/LONGITUDE INDEX SET SCREW. If you rotate your mount through its RA access and look at the ring that carries the DATE/LONGITUDE INDEX MARK you will see a small grub screw on the ring that carries the index mark. You will need to loosen this later.
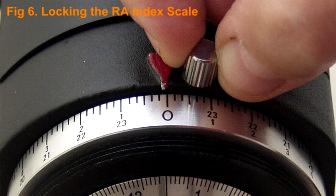
Note also the RA INDEX LOCK SCREW will ONLY lock the RA index in its Zero position. You’ll see as you go through the procedure that this is perfectly correct as it is only used in the polar alignment process.
Also on the diagram on the left you can only see one of the reticule adjustment screws – there are three of these around the eyepiece of the polar scope. The focus ring can be very stiff when new – turn counter-clockwise to focus the polar scope.
Before starting the alignment procedure you will need an Allen key that fits the reticule adjusters AND a small jewellers screwdriver to release the Date/Longitude Mark ring.
OK we are now ready to set up the scope for alignment.
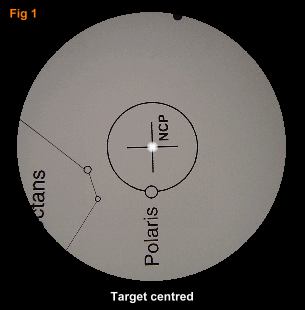
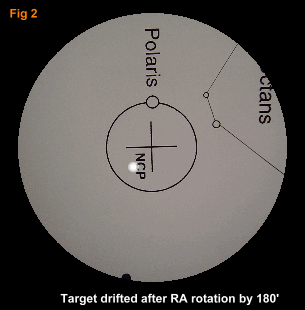
First you need to adjust the reticule to make sure that its lined up with the mount correctly. You can skip this step if you wish and are planning only to use the scope for observation use rather than photography. Skipping this step will introduce some errors into the alignment but that wont matter very much if you are just observing as you will be able to correct any error via the hand controller.
| ALIGNING THE RETICULE |
OK you’ve aligned the reticule and now your ready to set the polar scope up to locate Polaris. Heres how….
| LONGITUDE OFFSET |
From the Sky-Watcher manual:
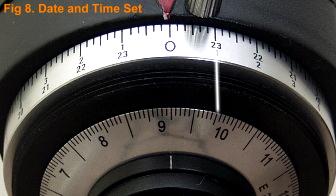
The alignment procedure requires that you set the Longitude scale to “Zero”.
Depending on where you live, “Zero” can be anyplace between the E and the W on longitude scale, so first you need to determine where zero is for your location.
Your Zero point is equal to the difference between your actual longitude and the longitude of the central meridian of your time zone. To calculate the longitude of your central meridian, multiply your time zone offset from Greenwich Mean Time (GMT) by 15. For example, in Waterloo, Ontario, Canada (Eastern Time) the time zone offset is -5 hours. Ignore the sign and simply multiply 5 x 15 = 75.The longitude of the central meridian for the Eastern time zone is 75 degrees west. The actual longitude at the viewing location in Waterloo is 80 degrees 30 minutes West. Ignore the 30 minutes and just use 80 in the equation. Now it’s simple, 80 – 75 = 5. Since 80 is greater than 75 the result is positive 5. That means Waterloo, Ontario is west of its Central Meridian. In this case, the zero point is at the “5” mark on the W side of the scale. If the location was east of its central meridian the equation would yield a negative value. In that case the E side of the scale should be used.
Your almost there….the mount is now calibrated and now we are ready to set up and align on Polaris and thus the North Celestial Pole or NCP.
If you have carried out the previous steps this next section tells you how to set up the scope to align on Polaris ready for observing.
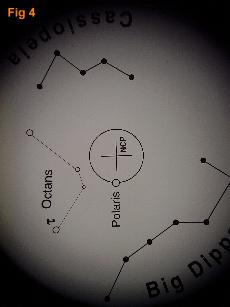
| ALIGNING TO POLARIS AND THE NCP |
Questions and Answers on this guide – the following are common questions I have been asked

