 |
 |
 |
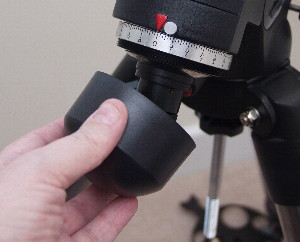
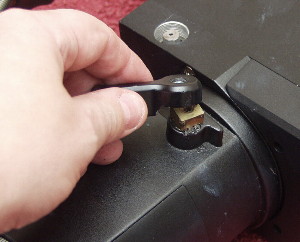
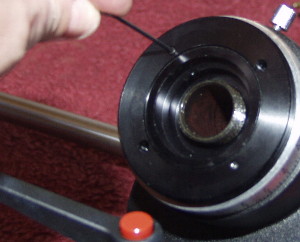
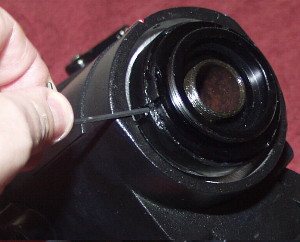
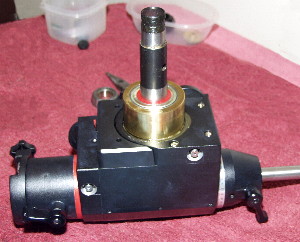
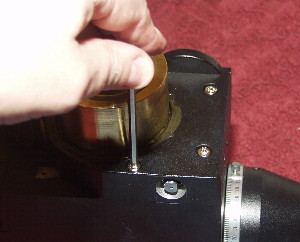
| Remove the polar scope cover. |
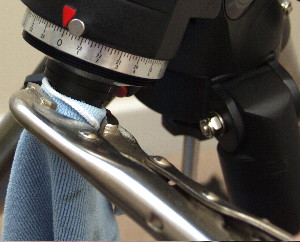
Remove the polar scope. You may need to grip it
with a wrench - if so wrap a cloth around
the
polar scope to protect it.
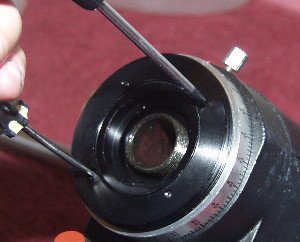
Alternately use some
masking tape to
protect the scope. |
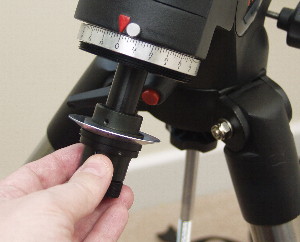
Once
loosened simply unscrew the polar scope and
place it somewhere safe. |
| |
|
|
 |
 |
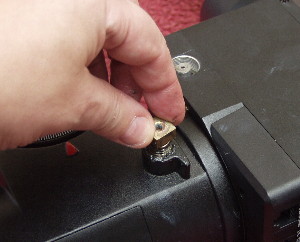 |
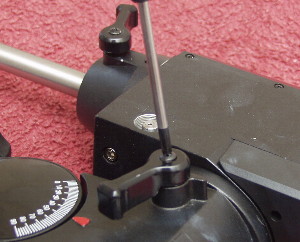
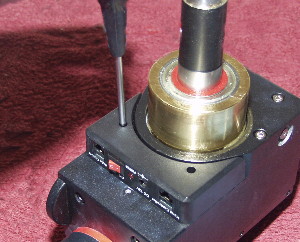
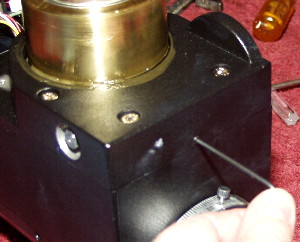
Remove the silver Phillips screw in the RA
lock lever. |
Remove the lock lever. You may need to
prise this
up by using the tip of a flat
bladed screwdriver and
gently twisting
the tip - see the Declination strip
down procedure for a picture of
this. |
Remove the brass RA lock bolt. You
may
need to use a small spanner or
pliers. Also remove
the small brass button beneath the lock bolt.
If
this is hard to do leave it -it can be removed easily
later in the
procedure. |
| |
|
|
 |
 |
 |
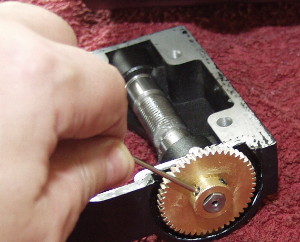
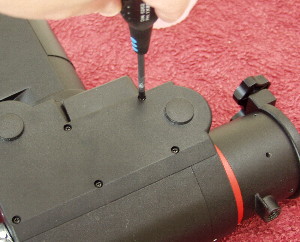
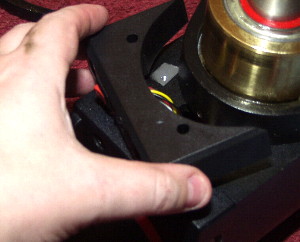
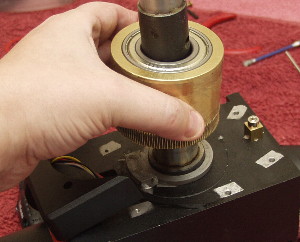
Unscrew the 6 Phillips screws around the
plastic
motor cover. |
Remove the motor cover and lay it aside
with its
screws. |
Slacken the two lock screws on the polarscope
mounting
plate. |
| |
|
|
 |
 |
 |
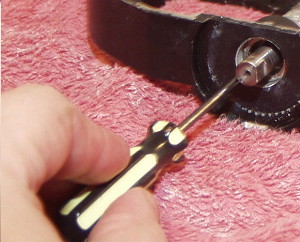
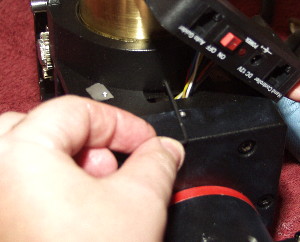
Now remove the polarscope mounting plate by
unscrewing it. You can use either some snipe
nosed pliers to locate into the holes
OR a pair of
small/medium Phillips
screw drivers or similar OR
a pair of
small Allen keys. |
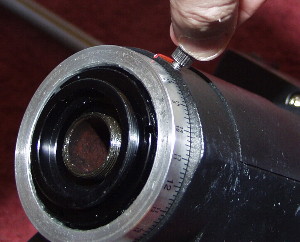
Loosen and remove the RA setting circles lock nut. |
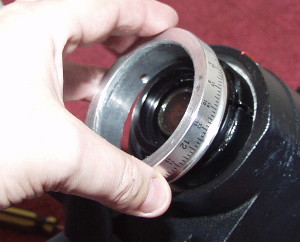
Now
remove the RA setting circle. It should just
slip off. |
| |
|
|
 |
 |
 |
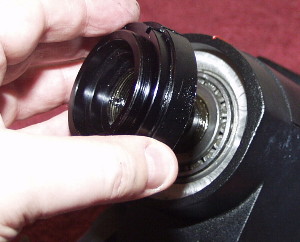
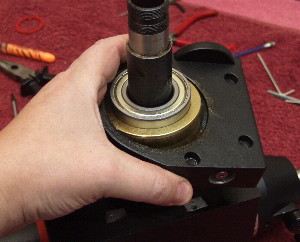
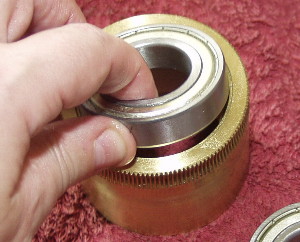
Loosen the three lock screws set around the large
circular aluminium nut. |
Unscrew and remove the circular nut. You may
need a wrench to do
this - if so be careful of the
polar-scope mounting plate
threads.
Alternately use a
pair of flat bladed screwdrivers or
similar to apply
even pressure using the slots in
the nut - do this
with care.
Once
removed observe the tapered bearing. It may
come out at this point - if not it can be removed
easily after the following step. |
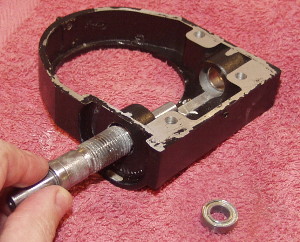
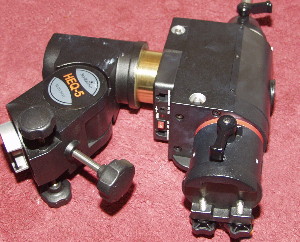
Remove the main RA Unit (right) from the base (left).
The Alt-Az base
contains a bearing which will most
likely not remove easily. Leave it in-situ but clean
the bearing and the Alt-Az internal
area and grease
the bearing face with
lithium grease.
Note: At this
point the small brass button for the
RA locking lever will be easy to
push out if you
were
unable to extract it earlier. |
|
|
|
 |
 |
 |
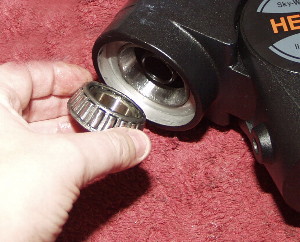
Remove the tapered bearing from the
polarscope
end of the RA axis. |
Here's the RA axis removed - naturally it also has
the DEC axis as part of it.
Note the red washer on top
of the worm gear. Make
sure this is kept safe and is
replaced during
re-assembly. |
Unscrew the power panel. Its attached using two
Phillips screws. |
| |
|
|
 |
 |
 |
Shift the power panel slightly. Be careful not to
pull
too hard as it has wires which
connect to the main
board inside the RA
main housing. |
Loosen the worm engagement set-screw located
behind the power panel. |
Loosen the worm engagement set screw opposite
the power panel and above the Declination
scale. |
|
|
|
 |
 |
 |
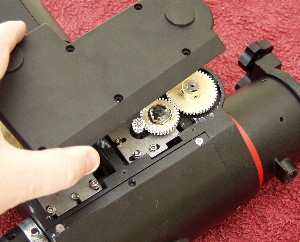
Remove the 3 cap headed bolts (silve
coloured)
from the worm carrier. |
Remove the worm carrier.. |
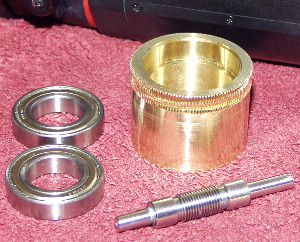
Remove the brass worm gear making sure
the small
red washer is kept aside. |
| |
|
|
 |
|
|
Remove the roller bearings from the
brass worm
gear. They should slip out easily. |
|
|
| |
|
|