astro-babys guide to stripping and rebuilding the HEQ5 mount
1 - Synta HEQ5 - Stripping & Cleaning the Declination (DEC) Axis


This procedure will guide you in stripping down and cleaning the HEQ5 Declination axis. Re-assembly of the Declination axis is covered HERE.

To carry out this procedure you will need a good assortment of tools including cross head and Phillips screwdrivers, a rubber or nylon mallet, a soft toothbrush,

degreasing agent, metric Allen keys, long nosed pliers, lots of lint free cloths and lithium grease.
I found commercial degreasing agents somewhat ineffective and resorted to using good old hot soapy water. Lithium grease is easily available from shops

selling bicycles. Its also advised to have a large soft towel or similar to lay the mount on while working on it to protect its external finish.

I would strongly advise you do not attempt this procedure without reading it through a few times in advance to understand the process. The procedure takes
around 2 hours from top to bottom unless you are very confident of what you are doing and have exactly the right tools. Its definitely best to have someone
around to help you with some elements of it - remember take your time and when in doubt STOP and think. Take a break when tired because you dont want
to bodge anything.

The DEC and RA worm gear adjustment process required after re-assembly can be quite lengthy as its very much trial and error so bear this in mind before
starting and allow plenty of time to carry out the procedure - it will pay dividends in terms of smooth and precise running and longevity of the mount.

Stage 1 - Stripping the Dec Axis
removing the dec lock lever screw removing the lock lever removing the locking bolt
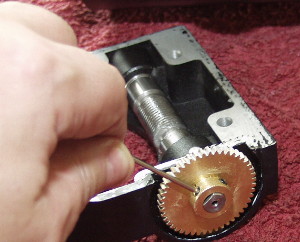
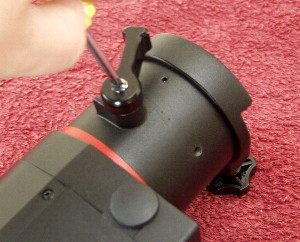
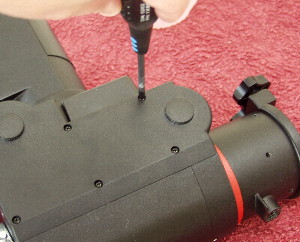
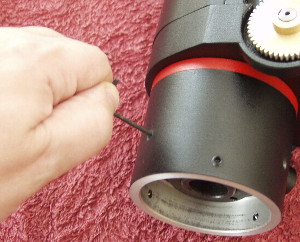
Remove the silver Phillips screw in the declination
lock lever.
Remove the lock lever. You may need to prise this
up by using the tip of a flat bladed screwdriver and
gently twisting the tip.
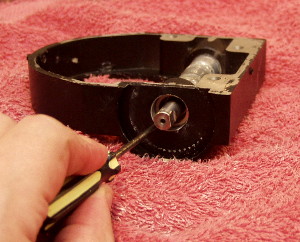
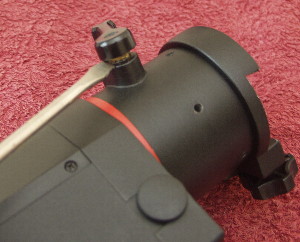
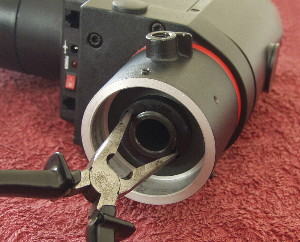
Remove the brass declination lock bolt. You may
need to use a small spanner or pliers to loosen it.
     
The locking bolt button Removing the heq5 motor cover Removing the heq5 motor cover
Remove the small 'button' if this didn't come out
with the lock bolt. If you cant get this out don't
worry it can be removed at a later stage.
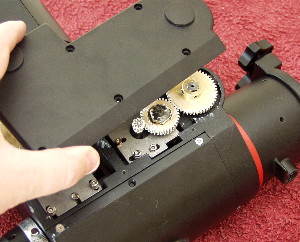
Unscrew the 6 Phillips screws around the plastic
motor cover.
Remove the motor cover and lay it aside with its
screws.
     
Removing the dovetail set screws Removing the dovetail carrier Loosening the Dec barrel set screws
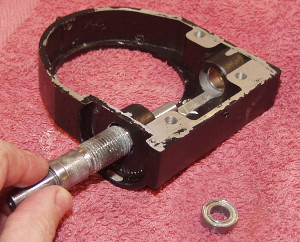
Loosen the 3 set screws in the dovetail carrier.
These are located closest to the dovetail.
Remove the dovetail carrier. You may have to twist
it back and forth and gently rock it off.
Note: You can at this point remove the
counterweight bar by pushing it up and out of the
DEC axis after removing the knurled safety nut on

the end.
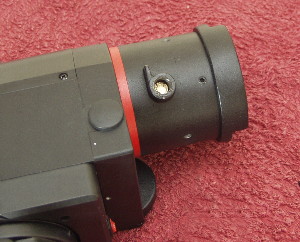
Loosen the deep set screws in the Declination
barrel. On my mount these screws do not hold
anything as the barrel is a single piece of machined
metal. But some mounts are two piece.
     
Removing the round nut on the Dec barrel Lossening the counterweight collar set screws Removing the counterweight collar
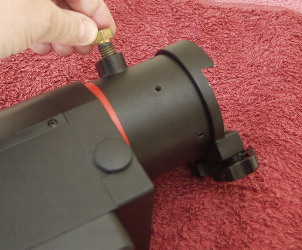
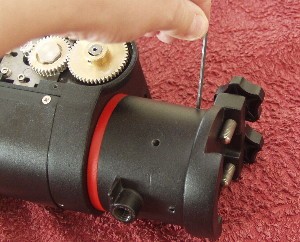
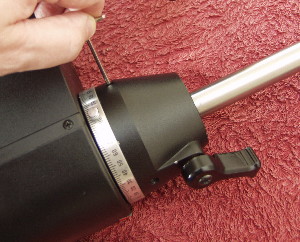
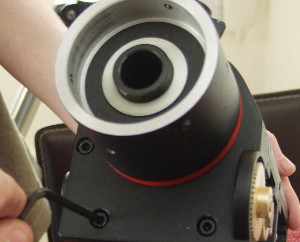
Unscrew and Remove the round 'nut' at the top of
the Declinationshaft. You can use either a pair of
Allen keys, two small Phillips drivers or a pair of
strong snipe nosed pliers as shown here. At this
stage you may be able to remove the Declination
barrel if its in two pieces (mine appears to be a
single piece) . If not don't worry and carry on - it will
be freed up later.
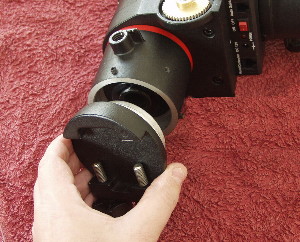
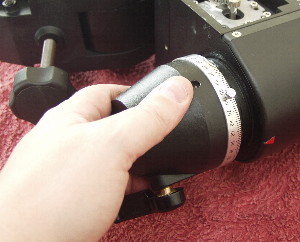
Loosen the three set screws in the counterweight
collar.
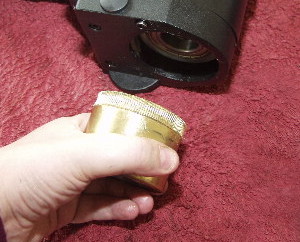
Unscrew the counterweight collar. It may be quite
tight.
   
Removing the tapered bearing Removing the declination scale from the counterweight collar Lossening the worm adjustment under the power panel
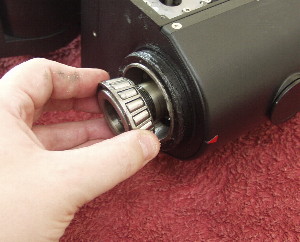
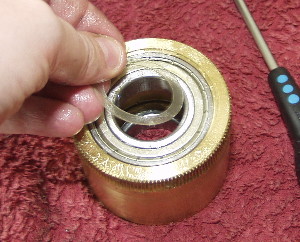
Remove the tapered bearing behind the counter-
weight collar. Mine showed very little lubrication as
can be seen here.
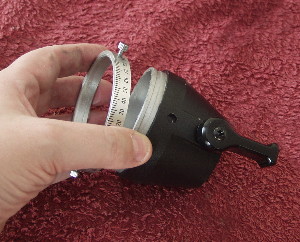
Remove the Declination scale from the counter-
weight collar. If the mount is to be GoTo apply a
small smear of grease otherwise clear any grease
from the collar.
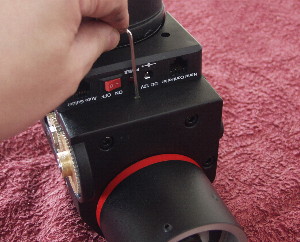
Loosen the worm adjustment set screw located just
in front of the power panel. This will need to be
loosened a lot.
     
Lossening the worm adjustment opposite the power panel Removing the worm carrier cap head bolts Tapping out the declination shaft
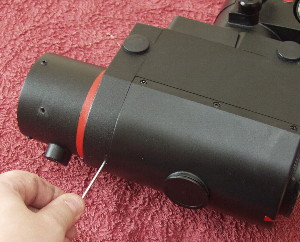
Loosen the opposing worm adjustment set screw
opposite the screw on the previous step - as shown
above. This will also need to be slackened off a lot.
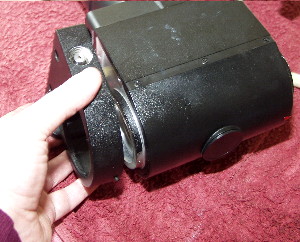
Remove the three cap head bolts. They are usually
silver coloured located on the top of the worm
carrier.
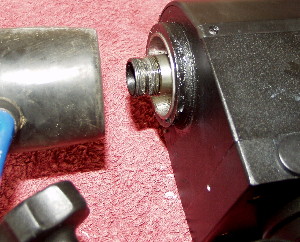
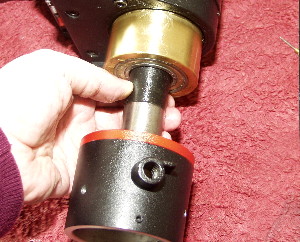
Now lightly tap the end of the Declination shaft
which is exposed (after removing the counterweight
collar) with a rubber mallet or block of wood.
   
Removing the declination shaft Removing the declination gear The declination gears clear washer
Slide out the Declination shaft and set it aside.
On my unit the Declination barrel refused to budge
from the main shaft - this isn't important.
Note: If you had been unable to get the lock lever
'brass button' earlier - it will now be easy to remove
from inside the Dec barrel.
Remove the brass Declination gear carefully. Take care to note and remove the small clear
washer andremember to replace it later.
     
Removing the worm carrier Removing the bearing from the main housing Removing the roller bearings from the worm gear
Remove the worm drive carrier. 
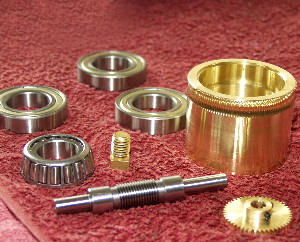
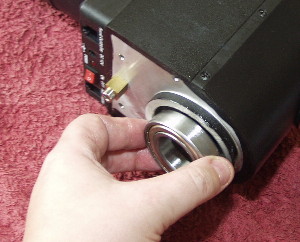
Remove the roller bearing from the main housing.
My bearings showed poor lubrication from the
factory.
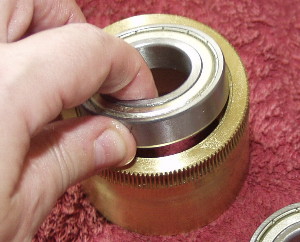
Remove the two roller bearings from the Declination
gear. The gear showed swarf contamination from the
manufacturing process in my mount.
     
Stage 2 - Stripping the Worm Carrier
Removing the worm carrier float screw extracting the worm from the carrier
Remove the brass drive gear from the end of the
worm. This has two set screws and may need to be
pulled off using some blunt nosed pliers on its
central raised area NOT on the teeth.

Do not lever this off as it can be easily damaged.
The worm is held into the carrier by two 'float'
adjusters. These require a special tool BUT can
be removed by using a pair of small screwdrivers.
Inser the drivers into the small slot and rotate
using even pressure. Remove only ONE of the
float adjusters.
Remove the worm itself. You will notice it has two
small bearings, these can be removed. One of the
bearings is shown in the picture in the bottom
right hand corner.
Note the worm adjustment set screws. You will
need to adjust these at the end of re-assembly.
     
Stage 3 - Cleaning & Lubrication
Bearings and worm gears after cleaning
With a clean lint free cloth now wipe all the oil from the components. On my mount the roller bearings
were sealed and appeared to be well lubricated so were left alone. The tapered bearing had almost no
lubrication and so was cleaned and relubricated with lithium grease.

To lubricate bearings put a blob of grease onto the palm of your hand and press the bearing into it and
then rotate the bearing around forcing the grease into the inside of the bearing.

The brass worm gears and steel worm should all be cleaned in a degreasing agent. I personally find
really hot water and a basic detergent works best. These were cleaned with a soft toothbrush and then rinsed and left to dry. All of the gears showed either little lubrication and/or engineering swarf though none of the legendary black 'goop' that is supposed to be used in Synta mounts.

The picture to the left shows all of the gears and bearings cleaned and awaiting lubrication and re-assembly.
 
 
That completes strip down of the Declination Axis. If you wish to go to the re-assembly guide click HERE
or go back to the main page HERE